100+-Year-Old Never Fail Pie Crust Recipe
100+-Year-Old Never Fail Pie Crust Recipe
.
Many reasons contribute to our immigrant ancestors’ penchant for pie-baking. Simple, honest, historic ingredients. Traditions of European countries. Affordability. And many more.
I had the superior benefit of a mother-in-law who’s a skilled baker and taught me the mysteries of pie crust nearly thirty years ago. I’ve slowly refined my methods, skills, and comprehension of how to make the best pastry. While researching and writing The Drifter’s Proposal (set mostly in Whipple’s Bakery in my fictitious town of Mountain Home, Colorado, circa 1900) I stumbled across a vintage pie crust recipe that fully changed everything I’d previously believed about pie crust.
OK… not quite everything.
But this recipe impressed me. It’s flaky, tender, easy to work with, and yields a spectacular taste and presentation.
.
![]()
.
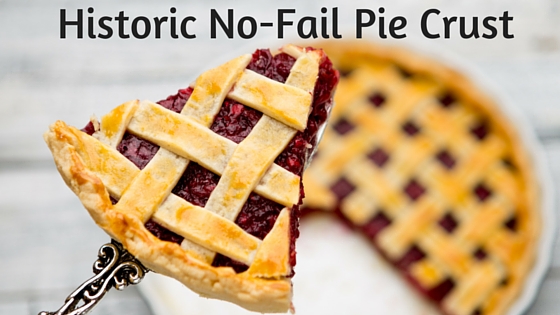
HISTORIC NO-FAIL PIE CRUST RECIPE
.
INGREDIENTS:
4 cups all-purpose flour
3 Tbsp. white sugar
2 tsp. salt
1 & 3/4 cups real dairy butter
1 egg
1/2 cup cold water
.
DIRECTIONS:
1. In a large mixing bowl thoroughly combine all dry ingredients (flour, sugar, salt).
.
2. Working with clean hands, rub room-temperature butter into flour mixture until bits of butter AT LEAST the size of a pea remain. (This means just what it sounds like. Work the room-temperature butter into the dry ingredients by working it between thumbs and first and second fingers.) DO NOT over-incorporate. Mix is not meant to be completely smooth.
.
3. Thoroughly blend cold egg and cold water together (I used what my grandmother didn’t have… a bullet blender). But a wire whisk or fork will do. Pour liquid into buttered flour combination and stir until just barely moistened.
.
Note: One of the biggest tricks to tender pastry is to NOT overwork the dough after water is added. Handle it all you need to before water is added.
.
4. Wash kitchen counter with dish soap and water, rinsing (with cloth) well (as if washing a dish… after all, that’s what it’s about to become). Dry off clean, rinsed counter top.
.
Note: this pie pastry recipe does not need to be refrigerated before rolling. That’s one huge benefit over egg-less recipes. In my experience, one of the reasons this recipe is “no-fail” is the pastry dough tears far less easily, making handling and transfer to pie plate a snap.
.

Punched Tin Panel Doors on Antique Pie Safe: www.antiquecountryfurniturestore.com
.
5. Sprinkle flour over work area. Divide dough into two portions for 9-inch pie plates, or into at least thirds for 8-inch pie plates. THINK THIN: pie crust is superior when thin. The thinner the better.
.
6. Using rolling pin, roll dough in various directions to keep a general circle shape. Use a bit more flour to keep the rolling pin from sticking, as needed. When the crust is as thin as reasonable, roll the pastry loosely around rolling pin to enable transfer from the counter top to the pie plate. Settle pastry into the pie plate, working it into position. With a butter knife, cut a full inch or a little more beyond the edge of the pie plate. (You need the extra to flute the edges or to fuse top and bottom crusts adequately.)
.
7. Prick the bottom and sides of the pastry in pie plate with tines of a fork, roughly every 1/2-inch. This prevents air bubbles from becoming trapped between pie plate and pastry, and misshaping your beautiful pie.
.
If you’re fully baking an empty one-crust pastry for a no-bake pie (such as chocolate creme), bake the empty crust at about 375º to 400º, checking every 10 minutes (or less) for bubbles. Pierce any puffs with fork tines so pastry remains as flat as possible. Our great-grandmothers didn’t have fancy parchment paper or pie weights.
.
8. For a two-crust fruit pie, fill the pie to 1/4-inch from the upper rim of pie plate. Roll the top crust in much the same manner as the first; transfer onto the top of filling. Cut the edge at the same 1-inch extension as the lower crust (note that you’ll need a smaller diameter for the top crust). Dip finger in a small cup of cool water. Moisten the lower and upper crusts where they meet, extending over the edge of the plate. Fold this extension under, all the way around and flute the edges using thumb and forefingers of both hands to create the wave-like appearance. This effort seals the crusts so filling is less-likely to leak out and boil over in your oven.
.
Cut venting slits in the upper pie crust (at least 4) in a decorative wheel-spoke fashion, allowing steam to escape (so upper crust doesn’t distort). Using a pastry brush, paint the upper crust (avoid the outer fluted rim as it tends to over-bake) with milk. Sprinkle the top liberally with sugar. Both the milk and sugar assist the crust in browning nicely.
.
To make a lattice top-crust, slice consistent-width thin strips (perhaps 1/4-inch) and starting on one side lay strips, alternating every-other-direction and folding back previously laid strips as necessary to form lattice appearance. Note: You’ll still want to use water to seal where the lattice strips touch the bottom crust and flute the pastry dough around the edges. Note: the butter and egg also improve the browning of the pastry over an egg-less or butter-less recipe.
.
Even perfectly-filled pies often overflow. It’s just the nature of flaky pastry and berries. I strongly recommend lining a jelly-roll baking sheet (with short sides) with foil or parchment paper and setting the pie in the center to bake. The foil or paper makes cleanup a snap.
.
9. Bake per directions in your pie filling recipe. As a general rule, two-crust pies require about 50 to 60 minutes in a 375º oven to ensure both top and bottom crusts are fully baked, become golden brown, and the filling (if not cooked ahead, such as canned fruit filling, for example) is fully cooked and has a chance to thicken.
.
![]()
.
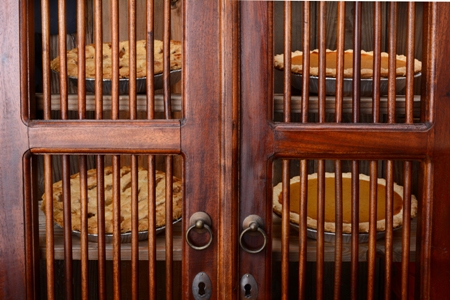
Close-up of an Old Fashioned Pie Safe
.
Related Articles
.
Easy As Pie!
.
.
Updated September 2021
Copyright © 2015 Kristin Holt LC
100+-Year-Old Never Fail Pie Crust Recipe 100+-Year-Old Never Fail Pie Crust Recipe

















Here you go again Kristin. And once again I will snag this recipe for use in my story of a Civil War Martha Stewart named Genevieve Holly. I won’t tell you what her pen name is….
Glad to be of help, Tracie. I see I’m turning you into a regular visitor. Nothing pleases me more.
this dough seems so sticky. I HAD to chill it to be able to roll. Is it really 1 3/4 c. butter, not sticks??
Hi Kristine–
I’m glad you tried this tried-and-true recipe…and so sorry it gave you grief. The first time I made it, prior to posting this article, the crusts turned out superbly! When I made it again at Thanksgiving time, I, too, ended up with sticky, too-wet-to-use crust. How aggravating! It’s supposed to be simple, easy, and effective. I double-checked the source, and it really is 1 3/4 cups butter. Reflecting on what I’ve learned through the years about pastry, I believe what I did differently the first time (when it succeeded) and the second time (with unfavorable results–not supposed to happen!) was my butter was too soft, too liquid. I’d recommend butter that’s still on the firm-side of room temperature. Add COLD water. I honestly believe that’s the fix. If you dare try the recipe again, please do let me know how it turns out.
Thank you for replying!
Best regards,
Kristin Holt